Solution for Roll (Label) Sticker Print & Cut
From:
Craft Magic Trading
| Machine: Jaguar and RX Series Cutting Plotter Software: TintTEK 20/20 Material: Window films、 Architecture films、Protection films、Safety films |
| Window tinting is no longer a handicraft industry now. With GCC cutter’s perfect cutting quality and TintTEK 20/20, the professional window tinting plotter, both of which will make your window film cutting process more efficient and cost-effective. |
| Heat rejection films provide function of heat reduction, and also the added-values such as whitening, UV protection, and personal privacy protection. Therefore, most car owners will choose colored or light reflective heat rejection films. In traditional process of cutting heat rejection films, you need to make an acrylic mold first, and cut the appointed pattern of window films manually piece by piece. This kind of process not only waste manpower and also increase storage space required for stocking acrylic molds, and heighten the possibility of material waste. |
| Now, replacing man-made work with GCC cutter’s accurate tracking and perfect cutting quality, it not only dramatically enhances production efficiency, reduces material waste due to artificial work inaccuracy, and most importantly it saves the storage space and material for acrylic molds. Moreover, with TintTEK 20/20’s auto plotting functions, heat rejection films can be efficiently plotted and ensure materials are fully utilized. |
| For experienced master workers in auto decoration firm, using GCC cutter instead of manual cutting process can increase productivity and allow more handling of cases. For beginners who wish to enter auto decoration business, GCC cutter + TintTEK 20/20 are undoubtedly your best choice. Don’t need to worry about the technical boundary at all. GCC cutter can be applied in car window films, as well as architecture films or protective films for decoration purpose too, even car stickers. GCC cutter can perfectly cut in all these applications and expand your business to a wider extension. |
| Below you will find a step by step instruction on how to tint a window from start to finish using your GCC plotter . |
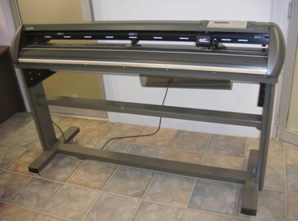
| 1. First, load you plotter with window film. Make sure the window film side is up. |
 |
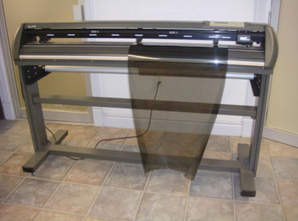
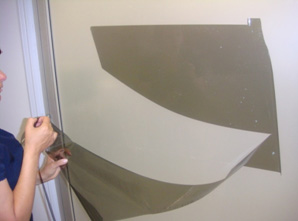
| 2. When the plotter finishes cutting, the film should look like this. |
 |
| 3. Cut film pattern off of the machine, and place on peel board to be ready for weeding. |
 |
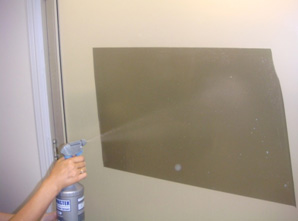
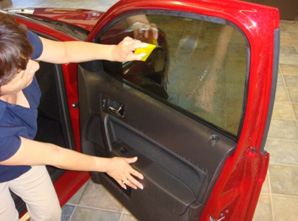
| 4. Prepare window for film installation by first spraying the window with soap water solution, then using a razer blade to scrape window, and lastly, squeegee window surface for film installation. |
 |
| 5. Separate release liner from window film. |
 |
| 6. Spray the entire adhesive side of window film with soap water solution. |
 |
| 7. Remove (weed) access cut film from pattern. |
 |
| 8. Handle the film properly and don’t touch the adhesive side. Get is ready to be installed to the inside of window.. |
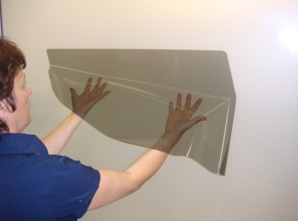 |
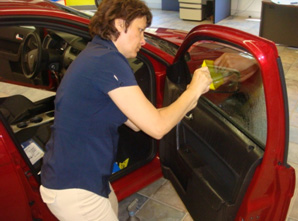
| 9. Install to inside of window, lining up the top edge of the film to the top of the window. |
 |
| 10. Squeegee excessive soap water solution between window film and glass. Until all water is removed. |
 |
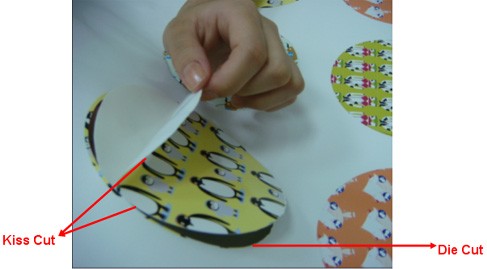
| The Die Cut function allows users to cut through the backing of the material and you can easily set up the length and force of die cut and kiss cut cutting line at the same job. This feature applies to different applications such as stickers and prototype of boxes, perfect for business owners who would like to provide customized and unique products. | 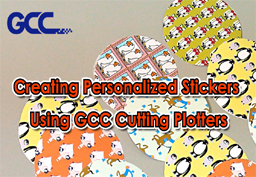
|
||||||||||||||||||
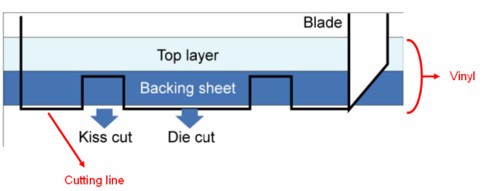 | |||||||||||||||||||
| * Die Cut cuts through the backing of the material Kiss Cut (half cut) only cuts through the vinyl but not the backing sheet You can now start creating your own personalized sticker by simply following the steps below: | |||||||||||||||||||
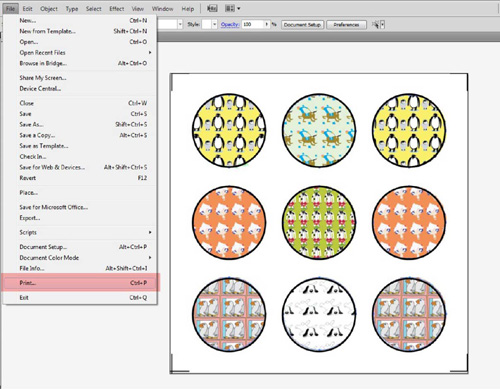
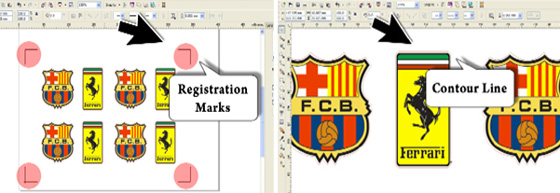
| Step 1: Create an image with a contour line and registration marks on Adobe Illustrator and then print it out. | |||||||||||||||||||
 | |||||||||||||||||||
| Step 2: Place the printed file on the cutter and position the carriage at the origin of the registration mark. Step 3: Process to the Die Cut function setting by clicking “print” under “file”. |
|||||||||||||||||||
 | |||||||||||||||||||
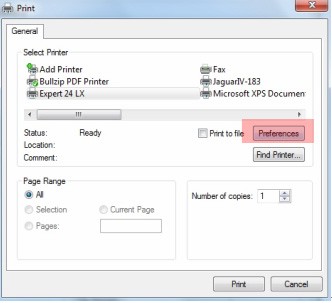
| Step 4: Select the cutter model and go to “Preferences”. | |||||||||||||||||||
 | |||||||||||||||||||
| Step 5: Go to “Option”, tick “Die Cut”, and enter the amount you wish for the “Length” and “Force” of both Die Cut and Kiss Cut, then click “OK ”. | |||||||||||||||||||
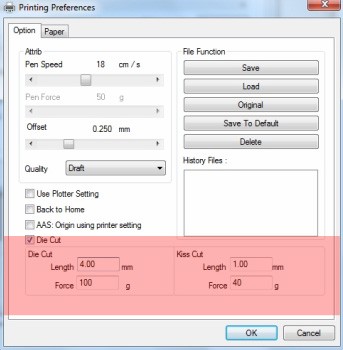 Range of length setting: Range of length setting:Die Cut: 0-2000mm Kiss Cut: 0-100mm | |||||||||||||||||||
| Step 6: Click “Print” when you go back to the General page after the Die Cut setting is completed and the cutting plotter will start working. | |||||||||||||||||||
 |
|||||||||||||||||||
 |
|||||||||||||||||||
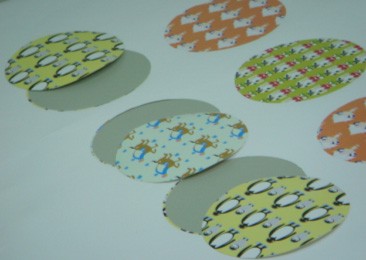
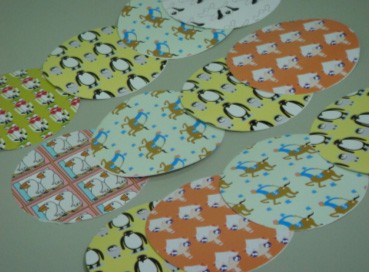
| Samples: | |||||||||||||||||||
 |
|||||||||||||||||||
 |
|||||||||||||||||||
| Reference Parameters | |||||||||||||||||||
|
|||||||||||||||||||


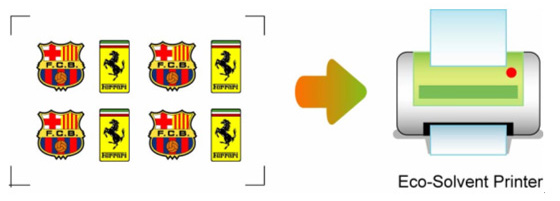
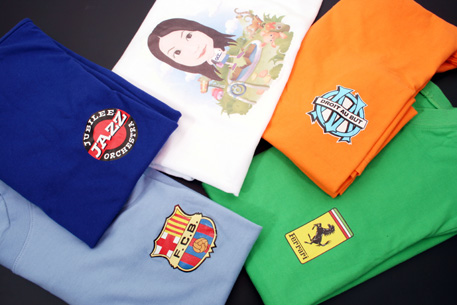
| Flex is excellent for textile heat transferring as it is highly flexible and tender with exceptional elongation and perfectly adhests to the textile with cracking-free capability. This film shows you how to heat-transfer an image on Flex to a T-shirt. A GCC Cutting Plotter, an Eco-Solvent Printer, a Heat Press Machine and some Flex is all you need to complete a customized T-shirt full of fun and creativity. |
 | ||||||
|
Step 1 Create an image with a contour line and registration marks on CorelDraw/ Illustrator and print it out on a heat transfer printable flex by an eco-solvent printer. | |||||||
| |||||||
|
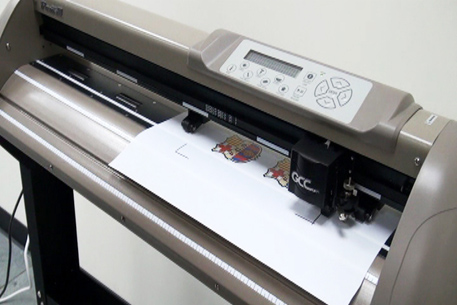
Step 2. Cut your image using a GCC cutting plotter. | |||||||
 | |||||||
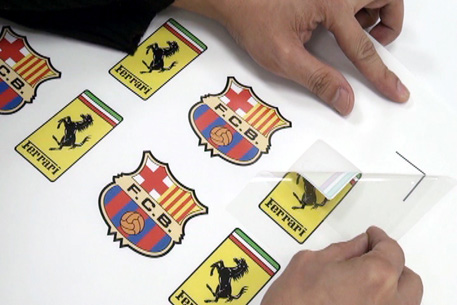
| Step 3. Firmly fix the printable flex on the heat transfer backing and remove the backing. | |||||||
 |
|||||||
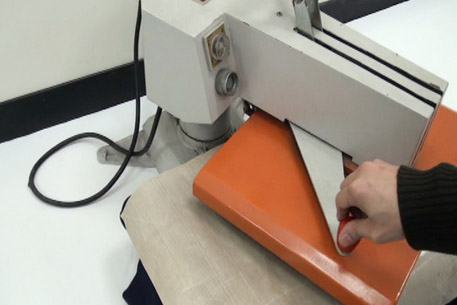
| Step 4. Place a Teflon sheet over the T-shirt and press the heat transfer backing with the printed image on the T-shirt using a heat press machine at 150℃ for 15 seconds. | |||||||
 | |||||||
| Now you have a customized T-shirt for yourself, or friends and families. | |||||||
 | |||||||
| From: Craft Magic Trading | |||||||


 |
Enhanced AAS II Contour Cutting System The Jaguar IV series features a standard Automatic-Aligning System(AAS II) to guarantee precise contour cutting by detecting the registration marks on digitally produced images. | ||
The significant functions include : | |||
| 1st-mark auto-detection | 4-point positioning | ||
| Segmental Positioning | Multiple copy | ||
 |
Efficient Throughput At up to 60 inches per second of cutting speed, Jaguar IV's cutting rate simply outperforms the competition. | ||
 |
600 Grams of Cutting Force Selectable cutting forces, ranging from 0 to 600g, accommodate a wide variety of materials, including fine and thin masking films to thick and hard reflective films. | ||
 |
Innovative Tangential Mode The tangential mode emulation mode is able to perform clean cuttings,diminutive letterings and intricate graphics which yield smooth corners and sleek edges on thick materials. | ||
 |
User-Friendly Control Panel The easy-to-use and multi-language control panel can remarkably simplify complex tasks. Available in 9 languages, including English, French, Italian, Spanish, Portuguese, Dutch, Japanese, Polish, Turkish, it provides various functional settings to meet users' needs. | ||
 |
Media Handling System The media handling system is fully adjustable. It handles media on standard cores and resolves media drifting and alignment problems to ensure better tracking. | ||
 |
Handy Grooved Cut Off Tool This handy and innovative design allows you to cut off a finished job in a straight line easily reducing the possibility of wasting usable material. | ||
 |
Windows Drivers Jaguar includes a Windows driver that allows sign makers to edit signs from CorelDRAW and output directly to the Jaguar system. Easy-to-understand drivers make sign cutting with Jaguar simple. | ||
 |
Selective Pinch Roller Positioning Each pinch roller can be positioned and operated individually, widening the Jaguar cutting plotter's range of applications. | ||
 |
Tri-port connectivity Jaguar supports tri-port connectivity with USB, serial and parallel ports. USB port provides faster and convenient data transmission between computer and Jaguar. Tri-port connectivity provides sign makers a great flexibility for data transmission. | ||
 |
Ingenious Media Basket (optional item) Equipped with a unique media basket, Jaguar ingeniously keeps your vinyl off the floor and away from dust or contaminants. Your production will be a clean and efficient operation. | ||
| Jaguar IV Series Specification | |||||||||||||||||||||||||||||||||||||||||||||||||||||||||||||||||||||||||||||||||||||||||||||||||||||||||||||||||||||||||||||||||||||||||||||||||||||||||||||||||||||||||||||||||||||||||||||||||||||||||||||||||||||||
| |||||||||||||||||||||||||||||||||||||||||||||||||||||||||||||||||||||||||||||||||||||||||||||||||||||||||||||||||||||||||||||||||||||||||||||||||||||||||||||||||||||||||||||||||||||||||||||||||||||||||||||||||||||||

|
Enhanced AAS II Contour Cutting System The Puma III series features a standard Automatic-Aligning System(AAS II) to guarantee precise contour cutting by detecting the registration marks on digitally produced images. | ||
The Significant functions include : | |||
| 1st-mark auto-detection | 4-point positioning | ||
| Segmental Positioning | Multiple copy | ||
| Tracking Ability The exclusive grid drum is precisely engineered to provide superb tracking ability. | |||
 |
Versatility Puma III is a versatile machine with the ability to plot and cut without having to alter the plotter's mechanical configuration. For vector cutting, simply install a blade holder; for plotting, simply install the drawing pen or a ballpoint pen. | ||
 |
Accurate and smooth operation Puma III incorporates a precision electro-mechanical design, which ensures an extremely accurate cutting capability. The state-of-the-art, closed-loop, high-speed digital servo drive system provides smooth, quiet, and fast operation. | ||
 |
Tri-port connectivity Puma III supports tri-port connectivity with USB, serial and parallel ports. USB port provides faster and data transmission between the computer and Puma II. Tri-port connectivity provides sign makers with great flexibility for data transmission. | ||
 |
Handy grooved cut-off tool This handy and innovative design allows you to cut off a finished job in a straight line easily reducing the possibility of wasting usable material. | ||
 |
Windows Drivers Puma III includes a Windows driver that allows sign makers to edit signs from CorelDraw and output directly to Puma III. It is very simple and easy to make signs with Puma III. | ||
 |
Friendly operation The user-friendly control panel comes with a large 20-digit x 2-line LCD and 14 control buttons, providing easy operation and simple navigation. The LCD allows users to monitor all operational settings including offset value, quality mode, cutting speed and cutting force. Buttons on the Puma III include frequently used functions such as speed, force, offset and cut test. 4 sets of prestored job settings for frequently used material can be stored in Puma III. These settings include cutting speed, blade offset, cutting force, as well as movement speed during tool-up and cutting. | ||
| |||||||||||||||||||||||||||||||||||||||||||||||||||||||||||||||||||||||||||||||||||||||||||||||||||||||||||||||||||||||||||
|
| |||||||||||||||||||||||||||||||||||||||||||||||||||||||||||||||||||||||||||||||||||||||||||||||||||||||||||||||||||||||||||